Kitchen Cooling Solutions for Business Owners

No matter how classy or rustic the restaurant is, the summer season can make things a little too warm for both staff and customers. Commercial kitchens in particular are notorious for being heat traps when it’s summertime. Temperatures in front of the grill alone can rise up to 40 and 45 degrees Celsius (101 to 105 Fahrenheit)!

The only way to combat the sweltering heat in the kitchen is to use a combination of hydration, ventilation, and circulation. Here are some other effective cooling solutions for commercial kitchens.

HVAC

Efficient HVAC can provide the foundation needed for proper cooling methods. The best unit will offer the necessary temperatures to keep the back of the restaurant cool and to control the air quality and dust in the kitchen and customer areas. Having proper HVAC installed can also enable chefs or cooks to hold food at safe food-handling temperatures longer, ensuring that the quality of the food does not lessen any.

Ventilation

There are two types of vents that must be present in a commercial kitchen for cooling purposes: necessary and general. The most necessary vents are exhaust hoods, which capture and filter out heat, smoke, fumes, and undesired particles, allowing air conditioning to perform at its most optimum level. General ventilation is usually a mix of air flow from several sources including a rooftop intake unit or properly screened open doors and windows to ensure insects and other pests don’t invade the food preparation areas.

To keep heat to a minimum via ventilation, you can do the following:

  • Get professional advice on whether to get a new exhaust hood installed or retrofitted. These are subject to health department inspections, so an upgrade will pay off.
  • Shade or shutter any windows in the kitchen that are fully exposed to sunlight.
  • Open the windows in the cool morning or later in the evening to allow fresh, cool air to come in. Make sure these windows are screened to prevent insects from entering (if there are none, leave them closed).

Fans

Using a combination of fans can help you discover the best spots for optimal circulation in the commercial kitchen. Try placing one fan on the floor with another placed on a steady surface overhead—the top of a refrigerator, for example. Always aim your fans away from food pick-up and prep areas as blowing away air can also scatter and blow away lighter foods such as greens and garnishes. For window fans, facing out can clear out hot air; facing in, they can stream in a cool breeze. You must always keep these fans’ blades, guards, and boxes free of dust though, otherwise you’ll have a health problem on your hands.

Other cooling solutions

If your commercial kitchen already has the aforementioned cooling solutions in place and things still get a little too warm, these other cooling solutions may help.

  • Thermometers around the kitchen can tell you when things are getting too hot to handle. Monitor them in food preparation and pick-up areas.
  • Educate your kitchen staff about heat-related illnesses and the signs to watch out for, including nausea, dizziness, and headaches, plus how to prevent overheating.
  • Encourage your staff to drink lots of water while on shift as opposed to dehydrating caffeinated drinks, and to take their breaks in shaded and cool areas.
  • Allow your staff to pop in and out of the walk-in cooler for a few minutes; this can refresh even the most exhausted staff member.
  • Schedule deliveries to your restaurant in the morning, before the heat of the day soars up.

Having these solutions in place will keep your staff productive and your inventory up to par with health inspector standards. If you need new HVAC solutions installed for your commercial kitchen, or you need assistance with getting your old equipment replaced, give us a call. At Rep-Air Heating And Cooling we provide our customers with many options that will best suit your needs from heating and cooling to refrigeration. Contact us today for your complimentary quote: 1-778-728-1476 or contact@repairheatingandcooling.comand don’t forget to take a look at our website: https://repairheatingandcooling.com. Follow us on Facebook and Instagram for free giveaways


Thermostat Tips for Comfortable Summer Temperatures

Nobody wants to endure sweltering heat in their very home. Air conditioning was invented for that very reason! What’s also not as fun is to discover a ‘surprise’ energy bill in your mailbox. If you tend to watch every dime and nickel, it can be a real drag seeing it all be spent on simply trying to stay cool.

The good news is, you can use your thermostat to stay cool and save money this summer season! Knowing how to keep the temperature at a good level in your home requires some fine-tuning and understanding that it’s a delicate balance, however. Here are a few other thermostat-based tips you can consider to help maximize the temperature in your home without maximising your costs at the same time.

The Best Temperature at Home in Summer

If you want to save money and stay cool this summer, then the recommended temperature is actually at 26 degrees Celsius (78 degrees Fahrenheit) when you are at home. The human body is actually its own thermostat, naturally adjusting to temperature even when we’re trying to cool down. The lower you set the thermostat, the higher your energy bills will be and the more difficulty your body will have to adjust to the colder temperature.

If you still have difficulty cooling down despite this adjustment, you can consider investing in a dehumidifier and follow the tips we’ll outline to trap cool air in your home.

The Best Temperature When You are Away

Want to save even more money this summer? Turn the thermostat upwhen everyone is away and not present at home. About 2 or 3 degrees up in Celsius (7 to 10 in Fahrenheit) can actually save as much as 10% on your cooling costs. A higher interior temperature will stop the flow of heat from traveling throughout your home, so it won’t take as much energy to cool the rooms back down when you return to your home.

Maximize Your Thermostat and Cooling Efforts

26 Celsius may sound uncomfortable to those who aren’t fond of heat. While your thermostat is set at that temperature while you’re at home, there are a few methods to stay cool without having to turn your air conditioner on all the time (remember, the longer it runs, the more it’ll cost you).

  • Ceiling and floor fans can help circulate the air and keep it flowing.
  • Keep blinds and drapes low in the morning to keep cool air inside.
  • Block direct sunlight using shades and awnings.
  • Try to keep lights switched off so that heat-burning lights don’t produce hot air.
  • Do your best to do your most heat-inducing tasks, such as cooking, during the cooler hours of the day.

Keep Humidity to a Minimum

Humidity can affect your urge to turn down the thermostat. It’s not uncommon for humidity levels to climb in summer, but this dangerous because as we’ve already discussed, the lower your thermostat goes the more you will have to pay for it. It doesn’t help that every room in the home has a different humidity level, with the bathroom, laundry rooms, and kitchen being the most consistently humid.

If you want to leave that thermostat alone, you may have to tackle the issue of humidity first. A few ideas include:

  • Leaving the windows and doors closed and checking the weather stripping and seals
  • Using room-sized exhaust vents and/or dehumidifiers
  • Adding a heat recovery ventilator (HRV); you can learn more about these neat systems in our blog post
  • Getting a whole home-sized central dehumidifier system installed, especially if the entire house has humidity problems

Iron out your schedules

One of the most expensive ways to cool a home down is to have the A/C on at full blast, even though nobody is home. Summer comes hand in hand with unpredictable schedules, particularly if you have kids (they’re out of school and may be involved in a lot of summer activities), vacations, longer hours of the day, and several other variations. So why bother fiddling with the thermostat to cool your home down if no one is around to appreciate it?

The best approach to ensuring everyone stays cool at home and the thermostat is left alone is to iron out everyone’s schedules. If that already sounds like a Herculean task, try starting with these basics:

  • Block out times when you know everyone is at home and sleeping
  • Figure out your work schedule, or your partner’s, or both
  • If you have teenagers with summer jobs, note their work schedules too
  • If you have a summer vacation planned, write down the dates
  • Write down everyone’s reoccurring summer activities, and those hours

When you’re done, examine your calendar from a bigger picture perspective and make estimates on when no one is home. Set your thermostat at the recommended higher level during the hours when no one is home.

If you have followed all of these tips and are still struggling to stay cool, check out our blog on how to stay even cooler this summerwithout relying heavily on the A/C.

Lastly, regular maintenance to your air conditioner can always go a long way. If you need any more advice on how to maximize your thermostat or any questions about heating and cooling, why not give us a call? At Rep-Air Heating And Cooling we provide our customers with many options that will best suit your needs from heating and cooling to refrigeration. Contact us today for your complimentary quote: 1-778-728-1476 or contact@repairheatingandcooling.comand don’t forget to take a look at our website: https://repairheatingandcooling.com. Follow us on Facebook and Instagram for free giveaways!

How to Choose the Best Commercial A/C for Your Business

If you run a business or work within a certain industry, you already know that working in a room where the temperature is controlled regularly has its perks. A cool temperature allows everyone to work at their best, including the boss or manager in charge of keeping everything and everyone performing to their fullest potential. Commercial air conditioning, in this case and many more, really can improve the quality of your life (if you’re the boss) and the lives of your staff members and customers. It can even preserve your most valuable inventory such as chilled food and beverages from getting too hot.

However, if you don’t understand HVAC in general or about the types of air conditioners a business can use, then you could potentially be running up your bills without realizing. If you want to install a new air conditioner before summer kicks in, it’s crunch time because us technicians are going to be very busy with other customers’ air conditioners! Here’s how to choose to the best A/C for your business if you need a new system in place.

Identify Your Business’s Needs

Depending on what type of business you run, there are going to be a lot of needs for air conditioning that go beyond simply cooling off your staff.

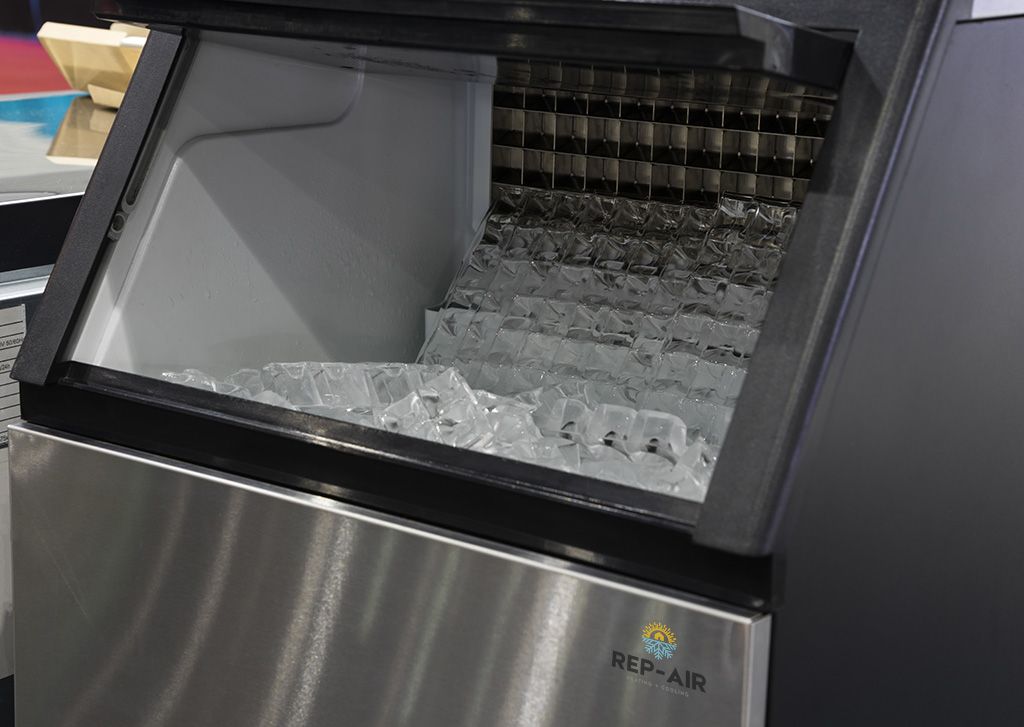
  • Do you run a restaurant or a store? Commercial refrigerators count as HVAC too. So do ice machines. The air conditioning you select should ensure these important units stay cool as well.
  • How many rooms and story levels in your building need to be cooled down? It matters if there needs to be one specific room alone or multiple rooms. More on that below.
  • Do you work at or help run a school or educational building? If so you may already be aware of other elements that involve these types of buildings and HVAC, which you can read about here in our article.
  • Does your business consist of valuable equipment such as computers? If so, air conditioning and ventilation is a must. You can read more about the reasons why we insist on that in our other article here.

Look at all of the Different Types before Settling

Knowing fully which types of air conditioners are available in the market before you settle on one can make the difference between A/C that only does part of its job versus a system that gets the job done entirely. The air conditioners below are an example of some of the highest quality units available for commercial purposes.

  • Single-Splits/Multi-Splits. The single-split system is the most modestly priced in terms of commercial HVAC budgets, ideal for cafés, small offices, server rooms, and similarly shaped spaces. The single-split comes with one exterior unit for every individual indoor unit. Multi-split systems are better suited for large office spaces, doctors’ offices, retail shops, diners, and several other interior spaces where the many walls and floors will often best benefit from multiple cooling units that connect to a single large outdoor one.
  • VRF/VRV. This system consists of a heat pump that uses refrigerant in the heating and cooling process, with more than one evaporator connecting to a single condenser. With this system there is a choice between choosing a variable refrigerant flow (VRF) or the variable refrigerant volume (VRV).
  • CAV/VAV. Constant air volume (CAV) or varying volume (VAV) have their differences despite how similar they sound. These air conditioning systems rely on a single-duct supply and return setup and use either constant or varying airflow to keep the temperature at the set points needed. The air in a CAV system consists of a constant speed at all times, with the flow always staying the same. Varying airflow means the system’s speed and airflow varies depending on your preferences.

Duct vs. Ductless

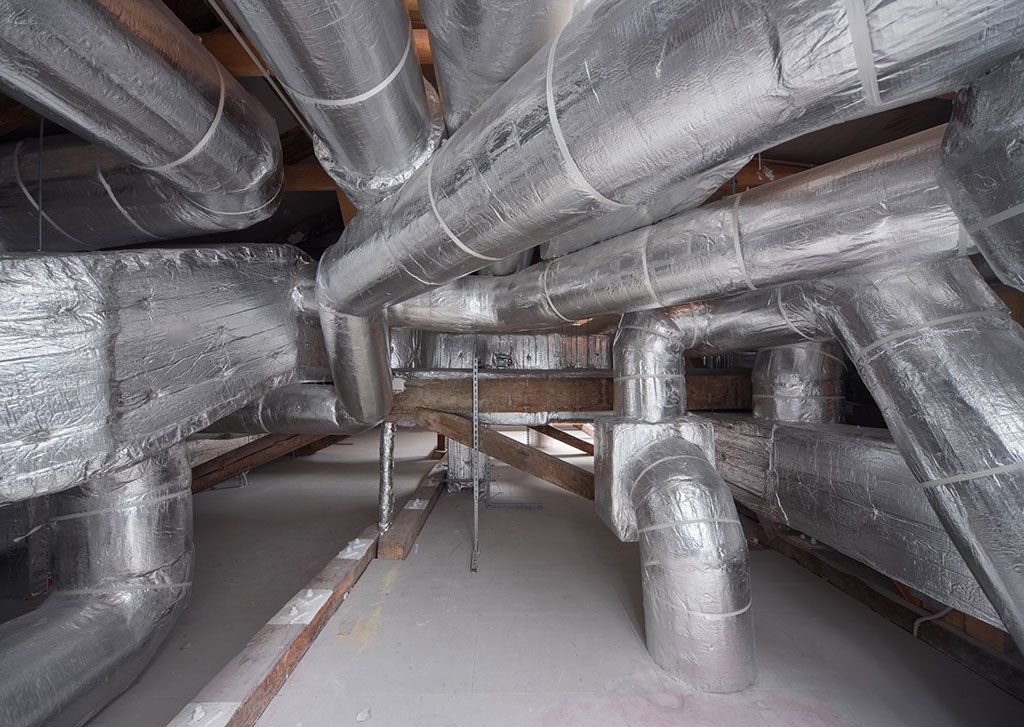
Above all the different choices, as a business owner the ultimate decision lies between choosing two very different things: a duct-based or ductless A/C system. The difference between the two is vast. A ductless system is exactly as its name implies: the system comes with no ducts. Instead, it only uses air handlers to blow air separately into each room. Ducted A/C systems are exactly what they sound like; they use ducts of sheet metal to allow warm or cool air to travel throughout the building.

When it comes to choosing between the two, it’s best you choose a ducted system if your building already has ducts; you need that improved air flow and control over humidity levels. Only go with ductless systems if you are adding a new room to your commercial property and space, if you want multiple, separate cooling zones, or if there’s no room left for ducts in the building.

Does Your Business Include Warehouses?

The warehouse requires its own specific ventilation in order to cool down the giant space adequately. In fact, depending on the size of it, you may have to combine several different systems in order to achieve the best cooling results:

  • Large ceiling fans.We’re talking about high volume, low speed (HVLS) ceiling fans with 24-foot blades. These will help cut down the temperatures in warehouses by 20 degrees or more.
  • Evaporative coolers.These combine a box fan with a well-refined misting system to provide cool, economical comfort levels.
  • Industrial box fans.These can move large volumes of air through large spaces (in this case, your warehouse) all while retaining its portability factor.

Whichever commercial air conditioning you choose, you’re guaranteed to save yourself some trouble and money by hiring only the best to install it. Call our trustworthy HVAC technicians if your company needs help! At Rep-Air Heating And Cooling we provide our customers with many options that will best suit your needs from heating and cooling to refrigeration. Contact us today for your complimentary quote: 1-778-728-1476 or contact@repairheatingandcooling.comand don’t forget to take a look at our website: https://repairheatingandcooling.com. Follow us on Facebook and Instagram for free giveaways!

A/C Placement Mistakes to Avoid Making for New Units

Summer is not quite here yet, but it is definitely crunch time if you need new air conditioning! If you have already read our previous post about whether it’s time to replace your HVAC or not, and you’ve made the call to get new A/C installed, then we need to follow up with a very important question: where do you want us to put this new unit?

If the answer is where the last unit was, then stop right there. We’re afraid we need to advise you on A/C placement mistakes you ought to avoid making before you ask us to install anything. Trust us, it’ll be to your benefit!

Why it Matters Knowing Where NOT to Put it

It may seem very tempting to just stick your heat pump condenser or air conditioner where it’s inconspicuous, or at least to say just put the new unit where the old unit was before. However, this way of thinking leads to several operational drawbacks within certain locations.

For example, if it’s placed in the same area where water can fall from the roof onto the unit, water will mess up the system’s outer and inner functions. If it’s placed where there is lots of direct sunlight, then it won’t be able to cool the air down as well as you need it to. Not to mention, if your old unit was originally an improper installation made before, then there’s no way the new unit may cool your home down efficiently either.

So, you need to take some time to consider where you have your air conditioner installed for long-term efficient performance and system life.

Basic Guidelines for ALL A/C Units

No matter what kind of air conditioner you need to have installed, there are basic guidelines that apply to all types of the system, regardless of the model:

  • There must be enough space surrounding the unit when placed outdoors, about 2-3 feet all around.
  • No obstructions should be near or on the unit; they’ll interfere with the cooling process.
  • The unit should not block passageways.
  • The unit should also not be placed behind doors or furniture.
  • All ducts connected to the unit should be replaced or at least inspected beforehand, so that cool air and energy are not wasted (or your money).
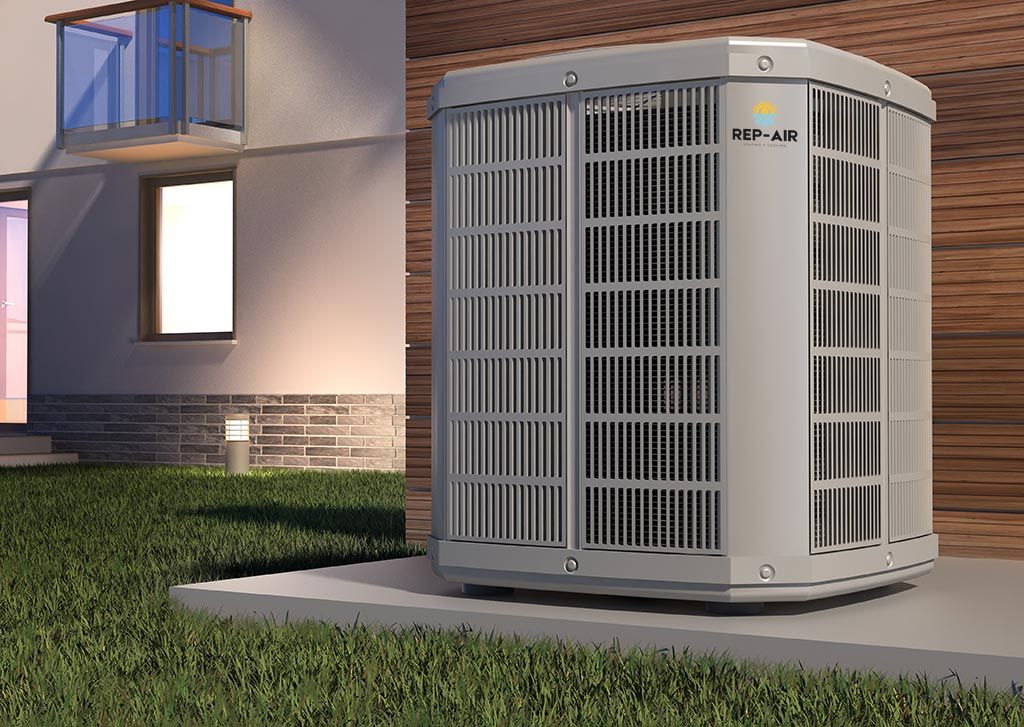
  • The condenser part of your air conditioner needs to be elevated away from rainwater pools, so there needs to be a concrete pad or a patio stone place installed too.
  • Be aware of the noise it can make on behalf of yourself and your neighbours; you don’t want your outdoor unit going where it can disturb both of your houses (i.e. too close to the bedroom, for either party).

Big No-nos for A/C Placement

  • Direct sunlight can mess with the way your new A/C unit thinks. It may assume it’s cooling down a hot room when in fact it’s not. However, simply shading the A/C unit won’t always work to lessen the effect of hot outdoor air because of how much air it needs to pull in to cool down.
  • You might think placing the new A/C unit in the hotter side of your house may also be of benefit, but that’s not true either. It should actually be placed on a cooler side of your house so that there is less strain put on the unit to cool down the air. If the air is too hot, the unit must work harder to cool the air down, and this in turn leads to longer run times, and eventually it will lead to costlier bills and more repairs needed for your unit.
  • Simply adding shade overtop of the unit won’t help either—it won’t always deter the effects of hot outdoor air in the summer because of how much air your unit needs to pull in.

Wherever you decide to have your air conditioner placed, you must always remember to make sure it never has to work harder to cool than necessary. The harder your A/C works, the more energy it uses and the more money it will cost you. That’s why when it comes to placement, you hire an HVAC technician who knows how to avoid making such costly mistakes.

Do you need help moving your A/C unit, or getting a new one properly installed and placed? Let us know. At Rep-Air Heating And Cooling we provide our customers with many options that will best suit your needs from heating and cooling to refrigeration. Contact us today for your complimentary quote: 1-778-728-1476 or contact@repairheatingandcooling.com and don’t forget to take a look at our website: https://repairheatingandcooling.com. Follow us on Facebook and Instagram for free giveaways!

5 Questions You Should Ask Before Replacing Your HVAC

We know that we talk a lot (i.e. almost all of the time) about how replacing an HVAC system outright can cost you less than it would to repair it—it’s a true fact that we stand by. One thing we haven’t really talked about though are what you ought to really ask about and research before you decide it’s really time to replace a unit. So, let’s do just that! Here are the top five questions you have to ask yourself before you really decide it’s time to get HVAC replacement.

1: How long am I going to stay here?

Do you currently live in a home you are determined to stay in forever and you want it to look and feel nice? Or do you plan to move or are forced to move in the next year? Basically, how long are you planning to live in your home?

If you are only renting, then HVAC isn’t really much of a concern—that’s up to your landlord. If, however, you are planning to sell your home, then replacing the HVAC units can actually be a big selling point in your favour.

2: How old is my equipment?

If you take a look at your home’s HVAC and realize the unit is older than 10 years, it’s not nearly as energy efficient as the latest models on the market. Maybe it was when it was new, but age shows—maybe yours is showing that old age. You will be saving yourself a lot more money down the road by installing a newer, modern unit. You should keep in mind, however, that the average lifespan greatly depends from one home’s environment to the next.

3: Have I asked for lots of repairs in the past year?

If you’ve been faced with one repair job after the other, then it is definitely a better idea to upgrade the entire system. Naturally, a few minor repairs performed only every so often (i.e. you can count on one hand the jobs done in the past several years) doesn’t mean you should give up your money outright on a new unit. However, if there have been frequent problems forcing you to replace or repair multiple parts throughout the entire year, replacing the system will be far less costly to you in the long-term. Speak with your professional technician for more info about this for sure!

4: Are my energy bills getting more expensive?

This one’s an easier question to answer. If it is no, then it means your system is running efficiently enough. Proper maintenance can ensure those energy bills stay low and keep your system working at its best for several years to come. That being said, all of the parts in a unit can and will eventually wear out to the point where it just can’t heat up or cool down efficiently anymore, even if you change the filters often enough or schedule maintenance once or twice per year. So, if the answer is yes, even though you’ve made no major changes in how often you use the system, it’s probably time to replace it.

5: Should I renovate before replacing my current system?

This question is a little trickier to answer. That’s because it entirely depends on the type of system you want to replace, the size system you may need versus the room you want it to go into, and whether the ductwork in your home is compatible with your new system. There are many other things to consider as well, such as the quality of the other components including the thermostat.

All of this you can talk over with your technician. They’ll know the state of your current HVAC the best, and whether or not it’s a good idea to renovate before they install your replacement system. After all, you don’t want to end up with an improperly sized system or encounter problems with your brand new one because of the room it’s going into.

So, now that you’ve thought harder about your answers to these questions, is it truly time to replace your home’s HVAC? If you’ve determined the answer is yes, give us a call. At Rep-Air Heating And Cooling we provide our customers with many options that will best suit your needs from heating and cooling to refrigeration. Contact us today for your complimentary quote: 1-778-728-1476 or contact@repairheatingandcooling.com and don’t forget to take a look at our website: https://repairheatingandcooling.com. Follow us on Facebook and Instagram for free giveaways!

Do I Need to Maintain My Furnace in Summer? (Yes, & Here’s Why)

We are slowly but surely approaching air conditioning season. With the temperatures rising earlier each year in spring, things can get pretty busy for us HVAC technicians! It’s also that time of the year when your furnace most likely goes into hibernation mode (i.e. you don’t switch it on for months until you need to).

With the temperatures going up outside, it begs the question: is it actually necessary to maintain your furnace in the summer? Well, actually, yes! And here’s why.

Reason 1: It’s an ideal time

Now that your furnace is going to be used less when it’s hot out, you’ll be more likely to find underlying problems that you may have missed when the furnace was on in the winter. Ideally even though it’s a new season, proper maintenance and cleaning still needs to be done whenever that new season comes around again. If you don’t clean your furnace every so often, you’re most likely to discover debris and other undesirables. Speaking of which…

Reason 2: Dust can still collect

And not only dust but also debris, pet dander, and other unwanted particulates that can create a lot of trouble if left alone. Insects can also be a problem if your furnace is located in a room where they’re likely to come wandering in and think your furnace would be a good home. You may not have to turn on the heat in summer, but as we mentioned before, your furnace does still need to be cleaned regularly, especially if you skipped out on that task in the spring.

Reason 3: It might not be switched off fully

You may think that by switching the furnace from ‘heat’ to ‘cool’ when summer rolls in that your furnace has been shut off, period. However, this does not actually mean your furnace is fully switched off. Rather, by making this adjustment your furnace is still running. It means the gas pilot is still on, the furnace’s fuel resources are being used up, and your furnace is still running even though you don’t want it to.

Reason 4: Electrical problems

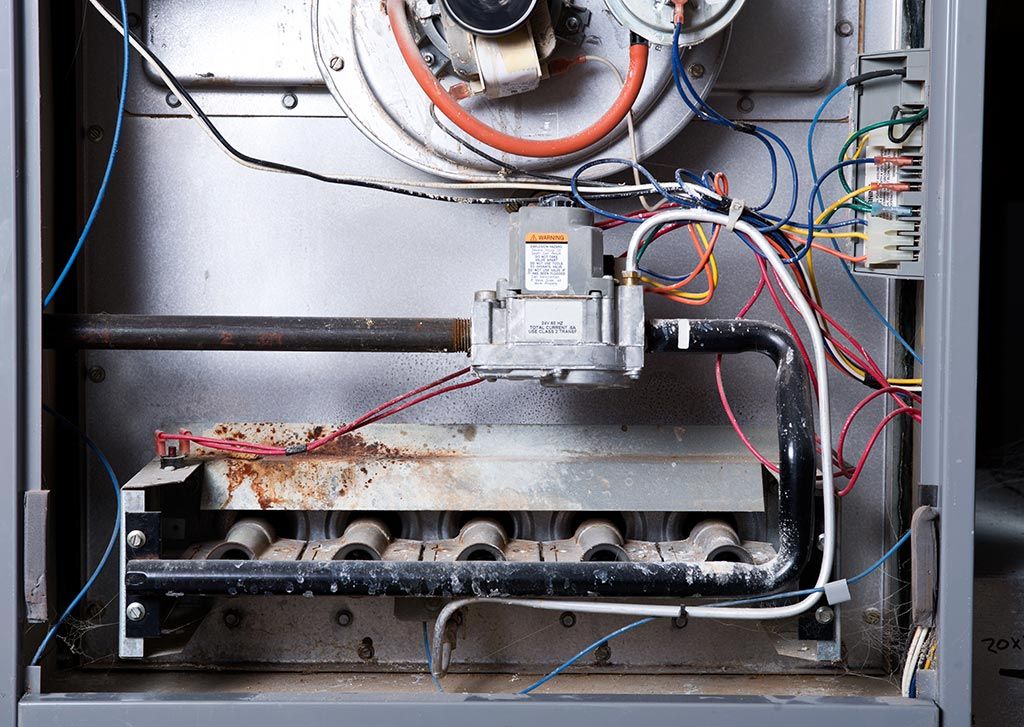
A quieter system doesn’t mean there aren’t potential problems, especially where the electrical components are concerned. This doesn’t mean going to fix any electric problems yourself! DIY with electricity is a very dangerous task best left to professionals. What you can do is while your furnace isn’t in use, open it up to visually check if any wires have come loose or completely disconnected. If so, that’s when you call in your technician so they can better diagnose the electrical problem and fix it professionally.

Reason 5: It makes sense

Maintaining your furnace in the summer even though it’s hot outside can help provide several benefits:

  1. It allows you to determine if you need a new one. Summer is actually the perfect time of the year to shop around for a new furnace, because everyone else will be so focused on using their air conditioning.
  2. It will save you some money. Maintaining your furnace when you don’t need it switched on, such as changing the air filter inside, can help minimize charges to your electricity and energy bills.
  3. It prevents potential damages to your unit. Even if you only ever maintain your furnace every six months, you need to at least change the filter more often depending on your household (for example if you own pets). So maintaining the furnace even when it’s summer can prevent long-term damages to the unit’s efficiency.
  4. It saves you resources. If it’s summer and you know you won’t need your furnace on the whole season, switching the furnace off fully for maintenance purposes (including the pilot light) can save you a little money on fuel too. Every dollar saved can help (especially if you want to make improvements to your home’s HVAC, for example).

If it’s been over six months since you had your furnace maintained, or you’ve discovered a few problems such as with the electricity or pilot light, give us a call. At Rep-Air Heating And Cooling we provide our customers with many options that will best suit your needs from heating and cooling to refrigeration. Contact us today for your complimentary quote: 1-778-728-1476 or contact@repairheatingandcooling.com and don’t forget to take a look at our website: https://repairheatingandcooling.com. Follow us on Facebook and Instagram for free giveaways!

How to Get the Most Out of Your HVAC Systems

Everyone is different when it comes to their comfort level and preferred temperature. When it comes to the heat and the cold, the ideal setting is one where you don’t have to worry about your HVAC systems one bit, other than the maintenance. That’s because when we are comfortable, then you never have a reason to mess with the systems in the first place!

Yes, we mean multiple systems, and not just the one. That’s because each system was built with a similar purpose in mind, and they all work together to ensure you live at a comfortable temperature no matter what time of the year it is. These methods of getting the most out of your HVAC systems will cover multiple units, regardless of their type.

Method 1: Consider the thermostats

This is the biggest way to tell if you are using too much or too little energy to get the heating or cooling job done. Paying attention to the thermostat is going to be the best way to optimize your HVAC system.

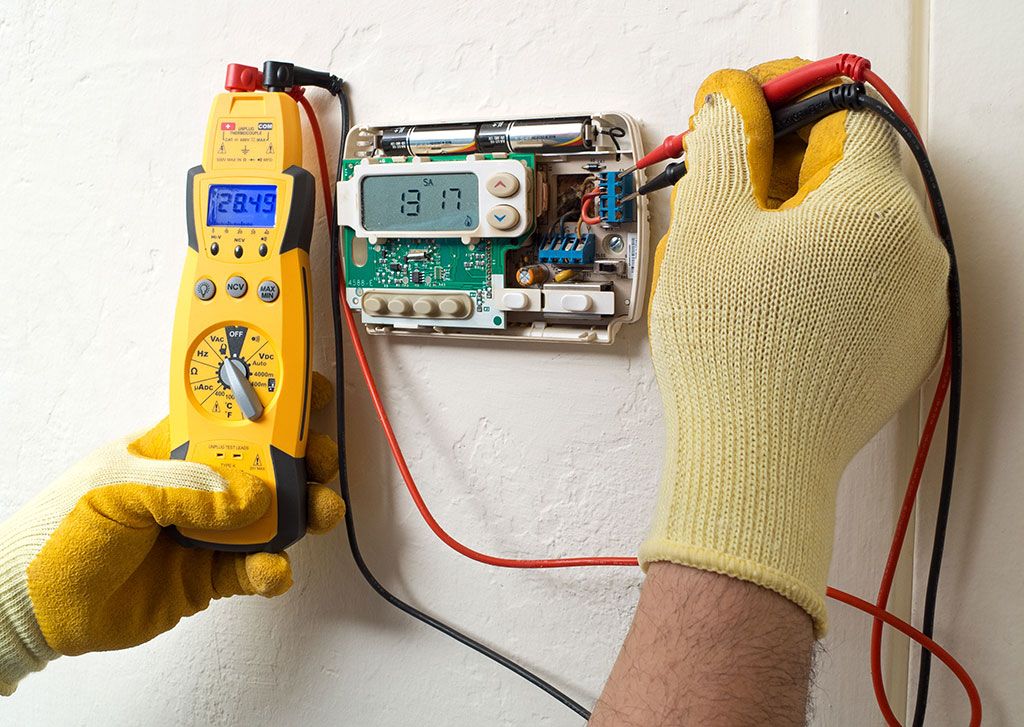
  • This part’s often forgotten despite how easy it is to take care of: changing the batteries. If these are what your HVAC’s thermostat runs on, replacing these once a year will help make sure the system doesn’t stop working due to dead batteries.
  • Several thermostats now come in digital form, offering you lots of programming options and automatic settings for energy saving when you’re not home. Changing the temperature too much, however, will cost you more energy and money than it would if you leave it alone. Rule of thumb: if you’re leaving the building at any point, try not to turn the thermostat any more than 3 degrees—in either direction—at a time.

Method 2: Understand energy ratings

Anytime you invest in a new HVAC system, whether it’s the furnace, a new air conditioner, or a heat pump, each unit comes with a customized efficiency rating. Be sure to pay attention to these measurements as they indicate how efficiently the unit will use its fuel, whether it’s gas, oil, or electricity. A good resource to learn about energy ratings is from your technician; we’re educated on the latest and best energy ratings for our clients (we have to be, so they get the units they need, not just what’s popular on the market). We’re also educated on several other topics relating to HVAC; seriously, it never hurts to ask us questions if you’ve got them!

Method 3: Ensure there are no air leaks

You should always check the windows and door frames in your home to make sure there are no air leaks or damaged parts where air can escape or blow into. This will ensure you are not letting warm air escape in the winter and blow hot air in by accident in the summer. Seal any potential weaknesses where a draft can occur. Some likely areas include your windowpanes, the patio door (if you have one), and the gaps under your doors. Other airflow leaks could come from your ductwork; fixing this will require some extra help from your technician.

Method 4: Maintenance is key

Checking on the air filters in your units regularly will ensure you have continually flowing fresh air throughout your home. As the weather grows warmer, it is recommended you check on the filter every month, particularly if your home is prone to heavy dust buildup or if you own house pets. Replacing it every three months is recommended for best airflow.

Other regular maintenance tasks is also strongly advised to ensure your HVAC system is working at its most efficient, such as checking on components, cleaning out areas that tend to dirty the most, keeping outdoor debris away from your units, and scheduling a tune-up from your technician once a year.

Method 5: Know when it’s time to replace, not repair

A lot of factors can determine when it’s really time to replace the HVAC unit outright as opposed to repairing it and calling it a day. If you also find that certain components, such as the thermostat, are faulty on more than one occasion, or that your energy bills keep going up and up despite your best efforts to save energy, it’s time for a replacement and it’s time to call in the professionals.

Need some more help getting the most out of your HVAC? Perhaps we can help? At Rep-Air Heating And Cooling we provide our customers with many options that will best suit your needs from heating and cooling to refrigeration. Contact us today for your complimentary quote: 1-778-728-1476 or contact@repairheatingandcooling.com and don’t forget to take a look at our website: https://repairheatingandcooling.com. Follow us on Facebook and Instagram for free giveaways!

5 Mistakes You’re Making with Your Commercial HVAC Units

Sometimes HVAC systems and commercial companies go hand in hand perfectly. For example, if you run a restaurant or a grocery store, then the need for HVAC is unquestioned; temperature needs to be controlled in these types of businesses for comfort and health reasons. Other businesses may not necessarily need HVAC, but it’s a welcome addition especially during the hottest and coldest months of the year.

Just like at home, however, mistakes can be made with commercial HVAC too. Here are the top five mistakes you really need to avoid making with the HVAC for your business—or maybe you’re making these mistakes already and need the wakeup call (we’ll leave it up to you to figure that part out).

Mistake 1: Using the wrong sized units

The sizes used to heat up or cool down your company’s building does matter. Too small of a unit cannot aid a giant room’s temperature; likewise, an oversized unit can cause all sorts of problems.

You need to go over these measurements with a professional HVAC technician; they’ve been trained to understand better how big or small a unit must be in order to perform its heating or cooling tasks properly. That way, you’ll know a more adequate system has been installed. Besides, the newer units are built to be more energy efficient than the older ones.

Mistake 2: Failing to provide the units space

Anytime you have an HVAC system installed in your commercial building, there needs to be enough space surrounding it so it can do its job right. Without proper space, the unit will force itself to work harder than it should to ensure its cooling or heating process is complete. Give those units space! The general rule is 2 feet of space all around, regardless of its location.

Mistake 3: Constantly fiddling with the thermostat

Repeatedly adjusting the thermostat on commercial HVAC is a big no-no for a lot of reasons. One, it forces the HVAC units to work harder than they need to. Two, it means no one will be comfortable. Three, it wastes more energy than you may even realize. In order to maintain a proper temperature, you need to keep that thermostat level and don’t touch it too often. If everyone at work is leaving for the day and it’s a long weekend, then at most you should only turn the thermostat either up or down by 3 degrees—no more than that.

Mistake 4: Improper duct systems

Just as the HVAC unit needs to be properly sized, so too should the air duct system attached to the units. You will not be able to achieve proper airflow or ventilation to rooms that need it the most (the computer room is one example) if you attach a newer unit to your older ducts. Likewise, you can’t just replace the ducts and expect your older HVAC unit to accommodate them.

Unlike clothing, HVAC installations are not a one-size-fits-all solution. For every purpose, whether commercial or residential, the system itself, the space surrounding it, and even the size of the ductwork must all be measured correctly in order for the unit to function at its very best.

Mistake 5: Failing to clean and maintain regularly

This is the biggest mistake of all because if you don’t clean or maintain your commercial HVAC units regularly, you lose valuable money and energy that could be going towards paying for other assets. Another thing that causes you to lose money is to pay for repairs to an aging system that really should be replaced outright instead of repaired—especially if it’s older than 15-20 years. Failing to clean the system filters also means you are exposing yourself and your staff to air pollutants and dust—and no one likes to work when they’re sneezing and coughing all the time.

Drainage problems in the HVAC systems for commercial buildings can also occur if you fail to clean and maintain them properly. Accumulating water that’s not drained properly can lead to mold and air pollutants; in cold weather the water can back up and freeze the insides of pipes; if the drainage system isn’t set up properly, it can lead to water leaks that create severe building damage. All of which spells trouble for your business!

If you’ve discovered one or more of these mistakes has been made, it’s not too late; get in touch with our professional technicians. We can replace or install older commercial HVAC with better, properly sized units. At Rep-Air Heating And Cooling we provide our customers with many options that will best suit your needs from heating and cooling to refrigeration. Contact us today for your complimentary quote: 1-778-728-1476 or contact@repairheatingandcooling.com and don’t forget to take a look at our website: https://repairheatingandcooling.com. Follow us on Facebook and Instagram for free giveaways!

How to Clean and Maintain Your Ice Machine

It’s that time of the year when hot drinks like freshly brewed coffee and tea are gradually replaced with their icy counterparts! Naturally if you offer beverages liked iced tea or iced coffee, you most likely run an ice machine in your restaurant, or maybe you run a pretty cool (pun intended) convenience store that sells ice cubes. Or, maybe you work at the movie theatre and help serve cold drinks?

Whatever establishment you either run or are a part of, an ice machine can bring some bonus to the quality of your beverage or frozen products. It’s when it breaks down or fails that’s less than impressive on several levels! To prevent that from happening, we’re going to go over how you can clean and maintain your commercial ice machine.

Step 1: Have your tools ready

To properly clean and maintain your commercial ice maker, you will need:

  • Heavy duty rubber gloves
  • Ice machine sanitizer
  • A mop and mop bucket
  • A cleaning solution consisting of lukewarm water and cleaner
  • Empty spray bottles for the cleaning solutions
  • Cleaning cloths
  • A soft-bristle nylon brushes or a sponge
  • Protective safety glasses for when making the cleaning solutions
  • A flashlight
  • The instructions manual for the machine (very important!)

Step 2: Remove any and all of the ice

If there is any ice remaining in your ice maker, you will need to remove it so you can clean it properly. Allow the ice to completely melt before you start working on cleaning. You can do this one of two ways:

  • Press the power switch at the end of the harvest cycle (after ice falls from the evaporators).
  • Press the power switch, and allow the ice to fully melt.

Follow the instructions laid out in the instruction manual for the ice machine in order to perform this task. The cleaning cycle usually lasts 20 minutes.

Step 3: Make sure the power is off

Once the cleaning cycle is fully complete and all of the ice has melted, disconnect the power to the ice machine (also disconnect power to the dispenser if there is one). Note that any machinery that you need to use on a regular basis needs to be shut off, including your ice machine. It may seem silly to you that we mention this step at all, but you never know…

Step 4: Remove necessary components

Again, refer to your ice machine’s instruction manual for this step. That way you can be sure the parts can be safely and properly removed and then replaced once they’re clean. Set these parts aside in a safe place.

Step 5: Prepare the cleaning solutions

Generally the water to cleaner ratio for this sort of task is to ensure there’s 1 gallon of water per 16 ounces of cleaner. Depending on how long it’s been since the ice machine was last cleaned, you may need to make a little more cleaner in order to remove the amount of mineral buildup that’s accumulated.

Step 6: Clean the parts

Use half of the cleaning solution you’ve made to clean all of the parts you’ve removed from the ice machine. If there’s foaming reactions upon spraying with cleaner, that’s normal; the lime, scale, and mineral buildup is reacting to the cleaner. That’s all it is. Once the foaming has stopped, use the soft-bristled brush or sponge to remove the mineral buildup and clean the part. Rinse them off with clean water when finished.

As you clean these parts, inspect in particular the evaporator, water hoses, water distribution parts, the water pump or reservoir, the water sensors, the thermistors (resistor dependent on temperature), and the cube sizing controls. If you spot something wrong, it’s best to call a technician for help.

Step 7: Clean the Water Filter and Condenser

As with every refrigeration unit, a water filter and condenser help the cooling and ice making processes function normally. If your ice machine is self-contained, it should have a washable filter that can trap the dust, dirt, lint, and grease that threatens to dirty your ice. Rinse the filter with mild soap and water. This task should be performed every 6 months to ensure the filter is kept in good condition. Check the water pressure while you’re cleaning to see if it drops; if so there are some restrictions that need a technician to fix the issue.

For the condenser, you will need to have the power turned off on both the remote condensing unit and the head section of the ice machine. Remember, safety first! Once the power is off, shine the flashlight on the condenser fins and inspect for dirt. If dirt is present, you can remove it one of two ways: one, rinse it with water from the inside out, and two, blow air through the condenser hose.

Step 8: Clean the Exterior

Now that the inside of your commercial ice machine is clean, you need to clean the exterior too. After all, that’s where your hands are being used the most to scoop the ice into beverages. This exterior should be cleaned as often as necessary, and thankfully this part is easy. All you have to do is wipe the outside surfaces down with a damp cloth with water to remove dust and dirt, or mild dish soap and water if there’s a greasy residue. Never, ever use any abrasive tools to clean the outside! Always refer to the manual for restrictions on cleaners and tools.

Step 9: Sanitize

Now that the cleaning process is done, it’s time to sanitize your commercial ice machine. Create a solution of lukewarm water and sanitizer in a separate spray bottle or bucket; as with the cleaner solution, your manual should indicate the correct ratio of sanitizer to water that’s needed. Use half of your newly made solution on all of the parts you’ve just cleaned. Apply the solution liberally with the spray bottle or let the parts soak in the bucket. Do NOT rinse these with water when you’re done!

As the parts are soaking, use the other half of the sanitizing solution to clean all food zone surfaces on the ice machine, the bin, and the ice dispenser. Pay close attention while applying the solution liberally to the evaporator plastic parts, the base (above the trough), and the side walls. Replace all components you’ve removed and refer to the manual for proper replacement.

Set your ice machine to start automatically making ice after sanitizing is complete. This will take 20 minutes, about the same time you need to allow the sanitizer to properly disinfect the machine. Observe a few cycles, monitoring the freeze and harvest cycle times. Throw out the first batch of ice that’s made (this ice contains sanitizer and cleaner anyway!).

Step 10: Schedule an inspection

If it’s been too long since the commercial ice machine was last cleaned or maintained, or you have no time in your busy schedule to perform these steps properly, there’s no harm in hiring professional help to do the job for you. You should never hesitate to call if you’ve identified any of the following signs of trouble with your ice machine:

  • There is still dirt in the condenser, even after cleaning it
  • The water pressure drops in the filtration system
  • You’ve discovered a faulty or broken part
  • The freeze and harvest times take too long, or no ice is released at all
  • The ice quality is too poor, even after cleaning
  • You’ve decided it’s time to replace the ice machine

In case you’re wondering, yes, we do install and repair ice machines for commercial businesses! If you’d like us to be the ones to clean and maintain your ice machine, or it needs an inspection or professional repairs or replacements at any time, give us a call. At Rep-Air Heating And Cooling we provide our customers with many options that will best suit your needs from heating and cooling to refrigeration. Contact us today for your complimentary quote: 1-778-728-1476 or contact@repairheatingandcooling.com and don’t forget to take a look at our website: https://repairheatingandcooling.com. Follow us on Facebook and Instagram for free giveaways!

7 Easy Spring HVAC Tasks You Can Do Right Now

By now spring is in full swing, and we’re sure you’re very busy getting the most out of what sunshine there is (or, if you have allergies, you’re trying to survive pollen season!). With the arrival of a new season comes a new list of HVAC tasks to perform. If you get these done and out of the way now, you won’t have to worry about your systems failing when summer hits! Here are seven easy things you can do now that spring has arrived at last.

  1. Check for damage from winter

The key aspects of your soon-to-be-used air conditioning in the summer are contained within the outdoor unit. Without that, you have no cooling process. Depending on where it’s located on your property and upkeep, there may have been some damage sustained during the winter months. Most of the time by damage we mean the dirt and debris from blizzards and storms that have built up when it’s cold outside. Thankfully, this is easy to remove.

  1. Maintain your air conditioner

Spring is an excellent opportunity to clean and prepare your air conditioner for when it gets really warm inside and out. It’s also the best time to inspect the unit and ensure there are no parts that look worn down or faulty. Having the parts replaced now (maybe with a new installation in mind) can be less expensive for you down the road.

  1. Replace your thermostat

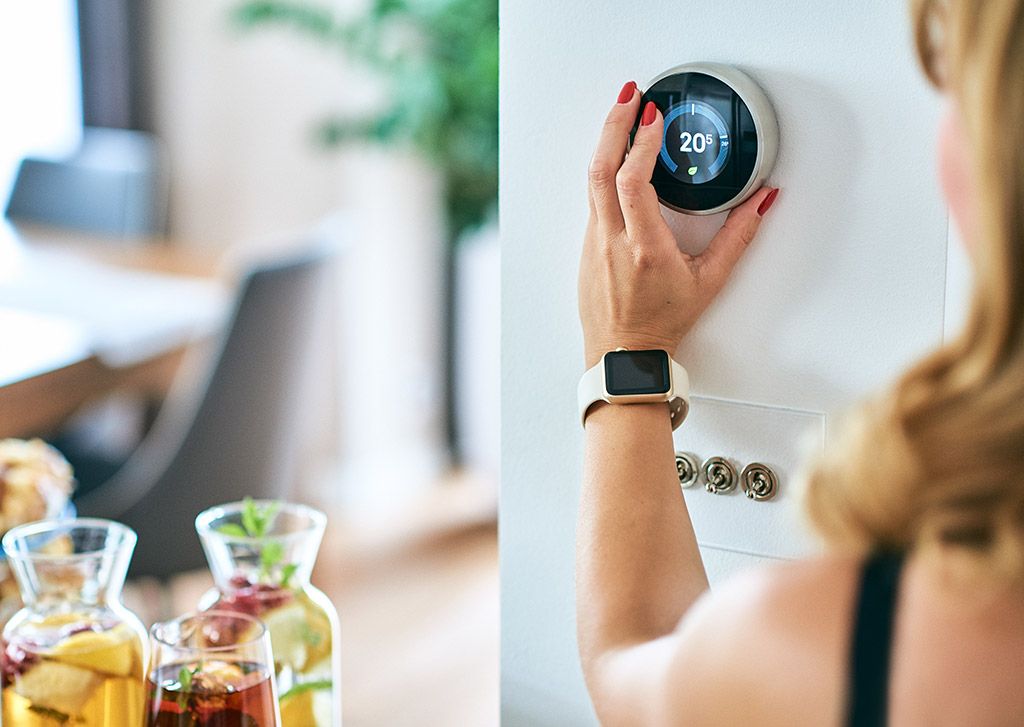
Maybe it’s time to upgrade this important piece of equipment? A smart thermostat is easy to control even when you’re not at home, ensuring that the temperature is warmer when you’re away and at a comfortable level when you’re at home. It’s a great way to save extra energy and money in the long run too!

  1. Inspect your hot water heater

The thermostat on your air conditioner is not the only adjustment you need to make. Your hot water heater should also be adjusted by a few degrees if it’s not at its comfortable 48 degrees Celsius (120 degrees Fahrenheit) already. Keep a sharp eye out for any potential leaks on the exterior, and also on the insulation on the cold water pipe. If the insulation looks worn down, it might be time to replace it. In the case of leaks, always call in the professionals!

  1. Change your furnace’s filter

Now that winter is nearly out the door, it’s a good time to change the air filter in your furnace. Remove it and give it a good cleaning. Just because the air outside is warming up doesn’t mean your home is going to stay clean air-wise. If you own pets or have allergies, all air filters need to be regularly maintained across all HVAC units, not just the one. It may have been a while since you checked the furnace’s filter, anyway…

  1. Clean your bathroom fans

The V in HVAC stands for ventilation, and your bathroom can easily become one of the most uncomfortable rooms temperature-wise if it goes uncleaned. It’s also probably been a while since you cleaned them too; lots of dust and dander can accumulate around the vents (doubly so if you own pets). In order to clean the fans, first switch off the power. Then remove the covers from the fans and wash them in soap and water. Use an old toothbrush to gently wipe the fan blades of dust before you place the covers back on.

  1. Get an inspection done by a professional

Once you’ve performed the above six tasks, it’s time to call in the experts. Now that spring is really in motion, it’s the low season for us technicians before the busy summer months kick in, meaning more dedication and time is spent on ensuring you have functional and effective HVAC units. Feel free to ask your inspector questions during the inspection! You may learn a few more new things about how you can save energy and reduce costs.

Need help? Get your inspection scheduled today! At Rep-Air Heating And Cooling we provide our customers with many options that will best suit your needs from heating and cooling to refrigeration. Contact us today for your complimentary quote: 1-778-728-1476 or contact@repairheatingandcooling.com and don’t forget to take a look at our website: https://repairheatingandcooling.com. Follow us on Facebook and Instagram for free giveaways!