Author: ciwg_CEO@906

Why Is My Air Conditioner Not Blowing Cold Air?

Days are heating up here in Mission, BC, and you need to have a reliable air conditioner to combat the heat. Your air conditioner works harder in the summer months to keep up with the harsh temperature summer brings. An underlying issue and an overworked air conditioner is a recipe for a breakdown or repair. In this blog, we have listed potential reasons to explain why your air conditioner is not blowing cold air.

AC Blowing Warm Air?

Below are 5 of the most common problems that may explain why your AC is acting up. Give us a call to help repair your air conditioner and ensure your comfort again!

  • Thermostat Issues
  • Leaking Refrigerant
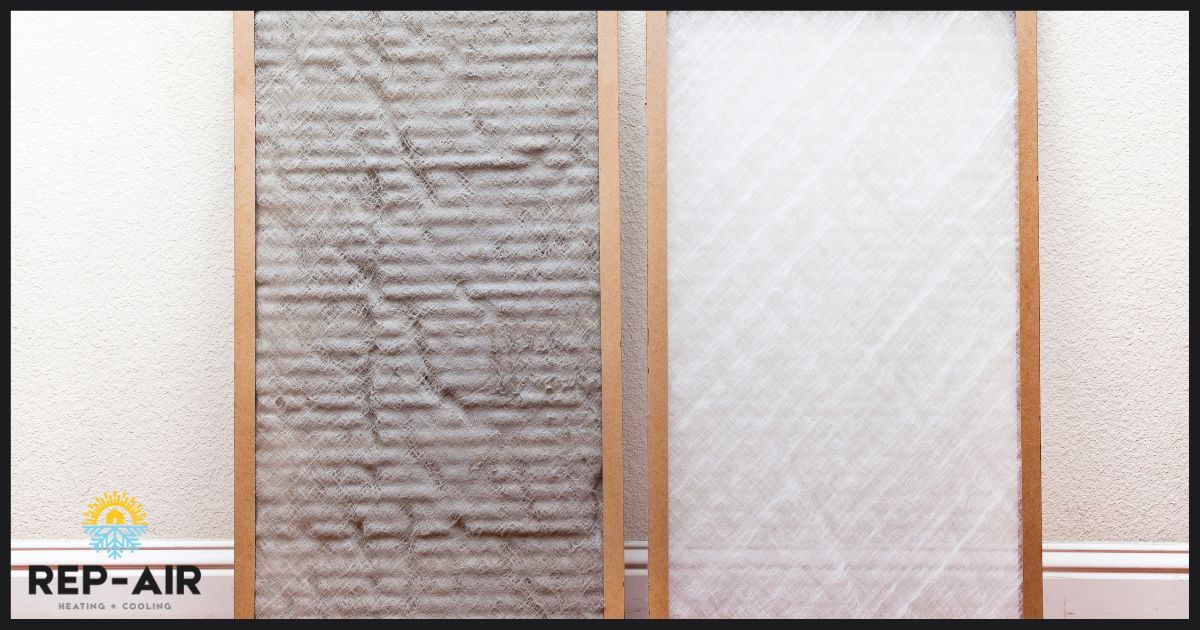
  • Dirty Or Clogged Air Filter
  • Dirty Condenser
  • Broken Compressor

1. Thermostat Issues

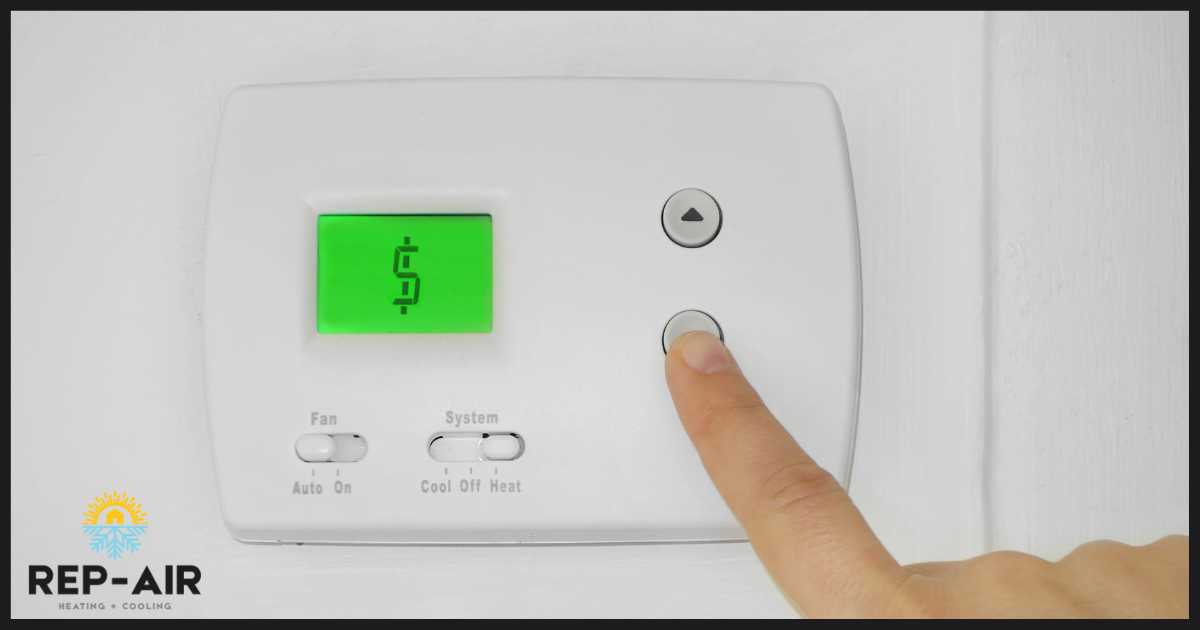
If your air conditioner is not blowing cold air, first check your thermostat. Ensure that your thermostat is up and running. If it is, check if it’s set correctly. It should be set in the “cool” setting and read your desired temperature. If your thermostat seems to be working properly and in the correct settings, it may be a communication issue.

2. Leaking Refrigerant

Refrigerant is a chemical compound that helps your air conditioner cool down air by absorbing the heat from the inside of your home and pumping it outside. When a leak is present, the refrigerant is unable to absorb that heat, stopping or decreasing the amount of warm air that is pumped out of your home. A leak can occur through:

  • Age-related wear and tear
  • Formicary corrosion, which is when the Formaldehyde gas used by the refrigerant creates holes in the copper tubes of your AC

A leak shouldn’t be taken lightly as it could cause more issues with your unit. If you notice or suspect that your refrigerant is leaking, contact your Rep-Air technician for a quick and affordable fix.

3. Dirty Or Clogged Air Filter

As most homeowners know, changing your air filter is essential to air conditioner efficiency and should be done regularly. Failing to do so can cause a clogged air filter, which restricts the airflow in your home. Below are factors that contribute to a clogged air filter:

  • Dust particles
  • Pet dandruff
  • Certain cooking or beauty products fumes
  • Indoor moisture

Ensure your home has a clean air filter if your unit is blowing warm air.

4. Dirty Condenser

The portion of the air conditioner that collects heat is called a condenser. The condenser is located on the outside of your air conditioner, which means it is exposed to outdoor elements. Dirt and debris such as grass clippings and leaves can easily enter and interfere with your system. When the condenser gets dirty, your air conditioner works twice as hard, because it reduces its ability to transfer heat to the outside air. Luckily, a dirty condenser can be easily cleaned with soap and water by gently removing the dirt with a cloth. If your condenser is prone to dirt and you find yourself having to constantly clean it, you might want to invest in a weatherproof cover when it’s not being used.

5. Broken Compressor

The compressor is the heart of your AC system. It transports refrigerant between the indoor and outdoor units. Too much or too little refrigerant can lead to a broken compressor, because it creates too much pressure and causes it to strain.

Contact a Rep-Air Technician

We understand how frustrating and uncomfortable it is when your air conditioner is broken. Give us a call at 1-844-218-3362 with any questions regarding your air conditioner blowing warm air. We are here to help keep you cool and comfortable this summer!

7 Ways To Save On Air Conditioning Costs

Did you know that heating and cooling can make up to 50% of your electric bill? The summertime brings the warmest months, which can cause your air conditioner to work overtime and raise your cooling costs. Staying cool and comfortable should not break the bank, so in this article we have provided 7 ways to save on air conditioning costs this summer.

Below are some of our tips and tricks to staying cool and saving money on your utility bill in this summer:

  • Regular AC Maintenance
  • Keep Your Blinds And Curtains Closed
  • Use Ceiling Fans
  • Replace Your Air Filters
  • Switch To LED Light Bulbs
  • Utilize A “Smart” Thermostat
  • Seal Leaks

1. Regular AC Maintenance

Making sure that your air conditioner is working properly is the most important part of ensuring a low utility and repair bill. Scheduling a preventative AC maintenance appointment every spring is necessary to ensure that your AC lives a prolonged life, free of issues. Even though your air conditioner may not have visible issues, a technician is able to point out less-obvious problems that homeowners tend to overlook.

2. Keep Your Blinds And Curtains Closed

Is there a particular area in your home that tends to stay warm no matter how much you crank up the AC? The sun might be to blame, and closing your blinds or curtains can help keep that area cool. Sunlight entering your home adds unnecessary heat gain, which causes your home to warm up and your AC to work harder.

3. Use Ceiling Fans

Ceiling fans have been around for a long time, and chances are your home has more than one installed! Even though your ceiling fan uses electricity to run, it can actually help lower your monthly bills. Turning your fans on can provide some relief from the summer heat by producing a fresh breeze as needed which prevents homeowners from constantly turning down the temperature.

4. Replace Your Air Filters

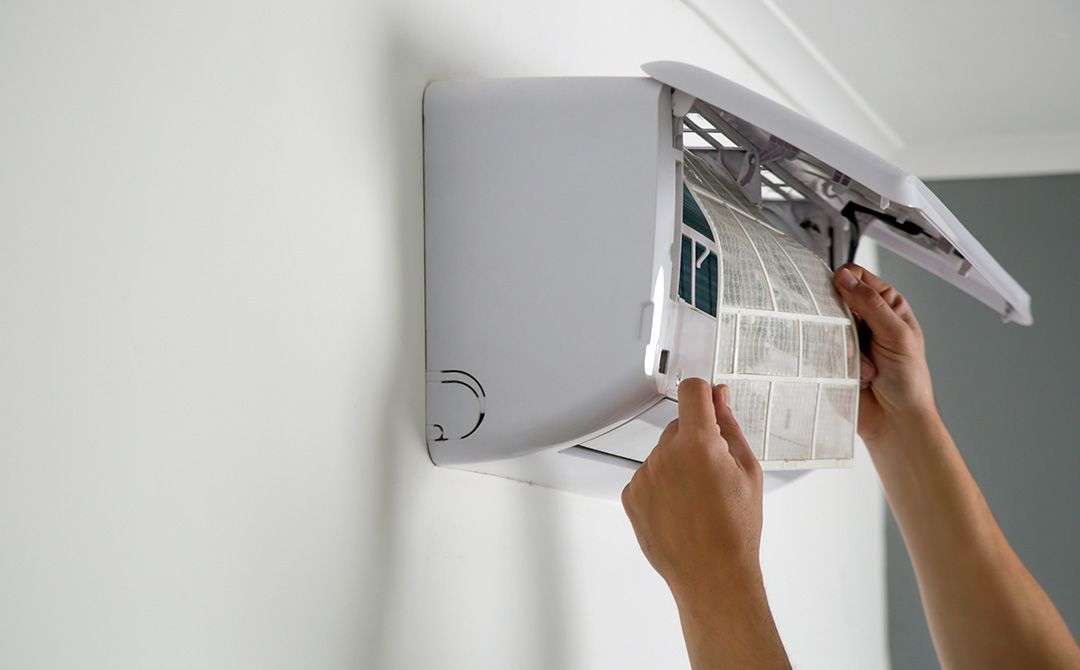
We recommend replacing your air filters every 90 days to maximize energy efficiency and keep your bills low. Dust particles can accumulate in the filter and block the cool air from coming through, causing your air conditioner to work harder. If you have furry friends at home, consider replacing your filters more often.

5. Switch To LED Bulbs

Switching to LED bulbs can contribute to decreasing the heat levels inside your home, because they produce less heat and use up to 75% less energy than incandescent bulbs. Although switching to all LED’s around your home might not make a significant difference right away, it will help with electricity bill-related costs in the long-run.

6. Use A “Smart” Thermostat

A programmable or “smart” thermostat is programmed to regulate the temperature of your home based on a series of preset settings that take effect at different times of the day. Installing a “smart” thermostat can help your air conditioner by allowing it to only work hard when needed.

7. Seal Leaks

Any inner and outer cracks in your windows, doors, and walls of your home might be contributing to heat coming in. For smaller air leaks, a cost effective option to seal cracks is by caulking or weather stripping. To ensure you seal leaks properly, consider hiring a professional technician to closely inspect your home and seal any leaks that are making your AC unnecessarily work harder.

Contact The Pros at Rep-Air!

Let us help ensure your air conditioner is running efficiently this summer to help you save on cooling expenses. Give us a call for any air conditioning maintenance, repair, or replacement needs this summer in the Mission, British Columbia area!

How to Cut Down on AC Usage and Costs

5 Ways To Lower Your Air Conditioning Costs This Summer

It’s getting warm out day by day (and even at night), so you know what that means: it’s time to put your air conditioner to use. Now, this can either mean a great thing or a bad thing, depending on one crucial aspect: money. It’s a fact that using AC does indeed cost you a lot whenever you run it. That’s because of several factors, such as the energy usage and the electricity used to run the system, both of which impact your utility bills.

Some of you may be wondering “I know this and I want to save money, but I also want to stay comfortable. What can I do?” If this sounds like your train of thought, we’re here to guide you. Here are some tips on how to cut down on your AC usage and costs.

Don’t Leave the AC on Full Blast All the Time

You may be surprised, but it’s actually fine to leave on air conditioning nearly all of the time if you leave it at a low enough temperature. What will actually spike your expenses is when you set the unit to provide cooling at full blast and leave that on all the time. Electricity is what an air conditioner uses the most of and it’s what will cost you the most money more than anything. By being forced to go at full blast, whether all day long or in intervals, you’re putting pressure on your unit that will shorten both its efficiency at cooling your home down and its life span from the strain of being turned off and then on again.

The effectiveness of your unit’s ability to cool air down and the unit itself can also determine whether one should leave the A/C on all day or turn it off at intervals. For example, if you own a central A/C system and it hasn’t been updated since you moved in 20 years ago, it’s definitely inefficient when it comes to energy and costs compared to a brand new air conditioning system made last year. You also definitely should not turn your A/C off during a heat wave, because it’ll make the indoor air’s heat rise faster and then your unit will spend a lot of time and energy while getting the air back down to an ideal temperature. In this case, it makes more sense to leave your air conditioner on all day (again though, not at full blast).

Use a Programmable Thermostat

A programmable thermostat can be set to the desired temperature whether at night or when you’re away from your home. Some can be installed directly into your home, while others actually come with their own app on your phone or other mobile device. It’s a good way to ensure you can adjust the temperature if needed, even when you’re not present to change the thermostat yourself.

Keep the Unit Clean

We know it sounds redundant, but that’s because it’s true. Keeping any HVAC unit clean, whether for cooling down or warming up a space, can make a real difference in both costs and your energy usage. We recommend you perform these regular tasks before, during, and after the summer season for best results:

  • Clean or replace the air filter, usually every 3 months or once a month if you have pets or kids
  • Tidy up the exterior and wipe away any accumulating dust or dirt
  • Before and after the summer is over, take some time to clean the fans and vents connecting to the air circulation

For more tips on taking care of your air conditioner prior to any heat waves, you can check out our previous blog post “How to Prepare Your Air Conditioner for the Warmer Seasons“. These tips can apply to during and after summer is over as well.

Invest in Ceiling Fans

If you can afford a ceiling fan or have the right home for it, this will improve things slightly and ensure you can use the cool air you have without relying on the air conditioner so much. Your ceiling fan should be set to rotate counter clockwise in the summer so that the air gets pushed down and you get that desired cool breeze. Remember to switch the fans around come wintertime in order to ensure the heat stays at the bottom of the room where you need it, since heat always rises.

Update Your Windows Slightly

If you keep feeling hot when standing next to a window, chances are there’s a tiny hole forming and you may need to get the caulk fixed. Caulking will seal any holes where cool air in the summer or hot air in the winter can leak out. In terms of staying cooler, you can always use film to tint your windows. This will make a room darker so that the sunlight doesn’t make the heat rise in your home so much. Most film for windows can be sized up and then applied yourself.

Need a More Up-to-Date Air Conditioner?

A new AC system or unit will seem expensive at first glance, but when you add together the cost of maintenance and repairs for a system that’s older and failing constantly, it makes more sense to upgrade. Our technicians can install new HVAC for you if your current system is no longer running as efficiently as it should and you want to stay cool this summer while keeping costs low. Let us know when you contact us if you’d like even more tips on how to save your money. At Rep-Air Heating And Cooling we provide our customers with many options that will best suit your needs from heating and cooling to refrigeration. Contact us today for your complimentary quote: 1-844-218-3362 or contact@repairheatingandcooling.com and don’t forget to take a look at our website: https://repairheatingandcooling.com. Follow us on Facebook and Instagram for free giveaways!

What You Need to Know Before Having an Air Conditioner Installed

The idea of owning an air conditioner while the months are hot and the days are long is a pleasant one. AC units can help people live more comfortably and in most cases they come built in with an air filter to keep the air both cool and fresh.

Keep in mind that just because you want your home to stay cool during the summer doesn’t mean you should simply go out and buy one if you don’t have one. All HVAC systems should be seriously considered an investment before you buy and install one, not a mere impulse purchase. Here’s what you need to know before you purchase and have your new air conditioner installed.

  1. Think about more than simply cooling

Air conditioners are not simply machines–they are expensive and require a lot of your forethought before you buy. It not only cools down a room, but also determines how comfortable you are in your space.

Most air conditioners nowadays do more than cool down a room, too. Some of the modern air conditioners on the market can throw hot air into the room to make it more comfortable in winter, such as reversible A/C units and ductless heat pumps. If humidity is a problem in your home, most cooling units can remove the unwanted heat that comes with it. And of course, don’t forget about some of the other handy features such as a timer, remote control, and ventilation to help you use the cooling system only when you need, rather than let it run always.

  1. Do you have the time?

If you live a busy lifestyle, you’re going to have to make some adjustments to that schedule because an air conditioner requires a lot more out of your attention than you might realize. All HVAC units require maintenance for at least every third month of the year in order to ensure it stays clean and its lifespan isn’t shortened from neglect.

Tending to your air conditioner outside of regular technician appointments is also going to be the only way to prevent further repair problems going forward. If you can’t find the time to do even that, then renting an air conditioner as opposed to buying one outright may be the better choice for you.

  1. Online buyers, beware

There’s a valid reason why us technicians wholeheartedly recommend buying all-inclusive, i.e. where the contractor provides both the A/C unit and installation. It’s because when you buy a certain unit online, there comes with it an entire slew of problems and extras you’ll have to go through:

  • DIY installation requires permits that you may not be able to get unless you’re a licensed contractor;
  • You could purchase the wrong sized unit by accident;
  • The unit could show up damaged in the delivery process;
  • You could end up lacking in the proper paperwork needed to run your system;
  • It’ll be 10 times more expensive since if your purchased the wrong size, you’ll have to buy another one right after

It may cost more to do initially, but choosing a licensed HVAC technician can ensure you pick the correct size for your space and get a unit that’s exact for your needs. It’ll also save you a ton of money and time in the long run compared to buying online.

  1. Always check on the SEER rating

The Seasonal Energy Efficiency Ratio, or SEER, is the quintessential system that rates an air conditioner’s energy efficiency. You want this ratio to be high in its number because it’s a ratio of both the unit’s cooling output and the energy used by your system. So, the higher the SEER’s value is, the more efficient your system is.

Keep in mind that having your air conditioner properly installed by a professional technician will also have a hand in how efficiently your system uses energy and overall performs.

  1. Location matters big time

The area where your new air conditioner should be installed matters a ton, because if it’s improperly placed then the unit won’t function the way you hoped, plus it may interfere with other objects such as electronics if you’re not careful. In order to figure out the best location, we recommend these general guidelines for heat pumps:

  • Your air conditioner’s outdoor unit should at least have 12-24 inches (1-2 feet) of space all around, with no objects in that space
  • The air conditioner should not be placed in either hot areas or areas where frequent foot traffic occurs
  • The place should be level, ideally on a pad that’s elevated so that the air conditioner’s condenser avoids contact with heavy rain and snow in the winter months

In addition, if your air conditioner is less of a heat pump and more of a wall-mounted indoor unit, here’s what we recommend you do:

  • The indoor unit should be at least 7 feet above your floor, with at least 6 inches (1/2 foot) of space both above the unit and on every side
  • Keep the unit away from other heat sources, such as the oven or direct sunlight
  • Electronics, cables, Wi-Fi modems, and even mobile devices should not be placed near indoor A/C units; keep these about 3 feet away to avoid electrical noise and interference, which is commonly associated with these devices
  • Furniture should be kept away so that it doesn’t obstruct the unit’s airflow
  • The indoor wall should be strong enough to support the unit for years, so ask for your technician to double-check the integrity of the wall and fasten the unit where needed.

Ready to cool off?

We want our customers to have the best cooling solutions that suit their homes or commercial buildings the most. Our technicians are certified and experienced with installing HVAC systems, so if you reside in the Lower Mainland and need an installation, don’t hesitate to call. At Rep-Air Heating And Cooling we provide our customers with many options that will best suit your needs from heating and cooling to refrigeration. Contact us today for your complimentary quote: 1-844-218-3362 or contact@repairheatingandcooling.com and don’t forget to take a look at our website: https://repairheatingandcooling.com. Follow us on Facebook and Instagram for free giveaways!

5 Causes of an Air Conditioner Failure You Need to Know About

Sometimes no matter how well we treat things like our air conditioning, there are some elements that end up causing your unit to fail when it’s needed the most. Thankfully, the majority of these problems can usually be fixed or maintained by a technician. However, it’s a good idea to fully understand the main causes of why an air conditioner’s failure may occur. That way, you can get a repair job done more smoothly if and when the time comes and in some cases prevent these failures from happening in the first place. So with that said, let’s go over five major causes of an air conditioner failure and what can be done about them.

  1. A clogged air filter

This is one of the easiest problems to both detect and prevent from getting worse. A clogged air filter will not only deter cool air from flowing in and out, but also it will force the unit to work harder than it needs to in order to produce the cooled air effect. The unit itself can’t tell why it’s clogged in the first place. That’s why it’s up to us to remove the filter and either clean it out or replace the too-dirty or dusty filter with a new one. Whichever you do to avert this completely preventable failure will depend on the make and model of your air conditioner.

  1. Electrical problems

A failure in your A/C unit can happen from a few electrical problems:

  • Poor electrical connections. These are more frequently seen in air conditioners that are well past their warranty and are old.
  • Bad wiring. This can happen as a result of wires deteriorating, corrosion, or faulty wires. Bad wiring can be best identified should your circuit breaker be tripped constantly while the air conditioner is on.
  • Overheated capacitors and contactors. A lot of electrical charge goes into these components, which creates the potential for them to get extra hot. When the outside temperature rises, even more heat will be generated from these two parts and thus cause failures.

The majority of electrical problems should never, ever be handled as a DIY project since the end result could end up being fatal electrocution. Diagnosing and fixing the problem is best left to a professional technician.

  1. Damaged components

An air conditioner is built up of several components, a few of which we mentioned before are electrical. The two parts that are most likely to cause the entire cooling system to fail include:

  • The fans/fan motors. There are two fans that are typically found inside of an A/C unit. One blows air over the outdoor A/C unit’s condenser to expel absorbed heat outside of the building, and the other blows the indoor air over the evaporator coil to cool it down. The motors for these fans can fail if they’re faulty. Other causes of the fans failing is too much dirt and debris buildup, wear and tear to the belts, or a lack of lubrication.
  • The compressor. Losing this part is the equivalent of a death sentence for your air conditioner, sadly. It’s the heart of the system and the most difficult to replace on its own. An entire replacement of the system itself is recommended in case this component fails you.
  1. A faulty thermostat

This is another component that if it fails on its own means trouble. The thermostat is what informs the air conditioner when to turn on and off in order to keep your home at your desired temperature. However, it’s possible for a thermostat to get out of calibration or break, which will cause the temperature in your home to fluctuate.

That’s why if your air conditioner is failing, be sure to check the thermostat first and make sure it’s reading the temperature properly. If it is, then the issue lies with another component connected to it. Again, this task is best left to a technician to diagnose and treat since there are several underlying causes of a faulty thermostat.

  1. Frozen Coils

Frozen coils are what happen when there’s a problem with airflow and the evaporator’s coil gets too cold. It sounds counter-productive, but heat is what needs to be absorbed in order for your unit to cool the air down. The heat is typically soaked in by the refrigerant located inside of the evaporator coil. If the coil is frozen however, then a lack of cool air or warm air is what your unit is going to produce instead.

How to Prevent These Causes

The majority of these causes may require a technician’s touch to resolve. However, you can prevent these causes from happening to your A/C unit by doing the following:

  • Clean out or replace the air filter before switching the A/C on.
  • Inspect the unit’s more delicate parts for potential cracks or damage.
  • Do an exterior tidy-up, especially for heat pumps.
  • Perform cleaning and maintenance tasks regularly, not just once in a while or as soon as you remember you own an air conditioner.
  • Ask your technician to check on the more vulnerable and complex components, such as the capacitor, the compressor, and the thermostat.

For more preventive maintenance tips please refer to our previous blog post “How to Prepare Your Air Conditioning for the Warmer Seasons.”

Need Some Help Before Summer Hits?

Take action now while it’s spring as opposed to reaching out for help during summer. Spring is a low season for the HVAC industry, so if you need someone to spend time on fixing or tuning up your A/C unit, we’ve got you covered. At Rep-Air Heating And Cooling we provide our customers with many options that will best suit your needs from heating and cooling to refrigeration. Contact us today for your complimentary quote: 1-844-218-3362 or contact@repairheatingandcooling.com and don’t forget to take a look at our website: https://repairheatingandcooling.com. Follow us on Facebook and Instagram for free giveaways!

How to Prepare Your Air Conditioning for the Warmer Seasons

Spring is starting to heat up the air at last, and for some areas in the Lower Mainland, maybe a little too much so! This season is a low one for us technicians, which is why it’s a good time to really think ahead and get some things ready while you’re spring cleaning meanwhile. If your area’s already getting a little too warm to handle, you may be considering putting the A/C on, and this is where we can help. Here are some tips on how to prepare your air conditioning system for the warmer months that lie ahead of us.

Why Now and Not Later?

Some of you may be experiencing more rain than heat and are probably wondering why we’ve decided to talk about this now, as opposed to later when it’s actually more like summer. There are actually a few good reasons for this:

  • It’s been a while since you looked at your A/C. Now that your furnace is becoming less relied on with the snow melting and the air warming up outside, it’s easy to realize that it’s been several months since you looked at your air conditioning. That system is going to need more than a simple on and off switch in order to function the way you want it to.
  • It’ll cost you less money down the road. As the years go on we’ve been having more summers in the Lower Mainland where we keep saying “I can’t believe it’s THIS hot out!” Having the A/C on all of the time means a lot of money being spent, so the less efficiently your air conditioner is running, the more likely it is you’re going to waste valuable dollars. You can save more money by prepping your A/C unit now as opposed to waiting until later.
  • It’s smart to look before you switch it on. With all that time spent off, you may find there’s some dust accumulation (which is a very bad thing!) among other things. Preparing now as opposed to later will mean that the process of switching things on will go a lot more smoothly.
  • You’re avoiding future problems. By examining your air conditioning now, you’re going to be able to spot problems that may occur down the road. If you do spot something you’re not sure about, you can definitely mention this to your HVAC technician next time you ask for an inspection. And now while it’s spring is a great time to ask us, because like we said, spring is a low season and a less busy one, so we have more time to look at your system and ensure everything is working the way it should be.

As you can see, there are a lot of great reasons to look at preparing ahead of time. Let’s go ahead and see what we can do to get ready for the warmer seasons.

Step 1: Check the Age of Your System

How long have you owned your air conditioner now? It’s worth looking at the owner’s manual or the details outlined on the machine itself. Some models come with that information on them, depending on their manufacturer. If the date is under 5 years, that’s great—you don’t have to worry about things like warranty for a while. However, if you’re looking at a machine that’s getting past its 10-15 years of usage, it’s probably time to consider getting that system replaced. Your HVAC technicians can take care of the rest.

Move on to step 2 if the age of your system is good to go.

Step 2: Make Sure the Power is Off

This may seem basic, but it matters because it involves your safety. Turn off the air conditioner at its service panel. Some air conditioners also possess a disconnection box, which typically consists of levers, fuses, or a circuit breaker. Be sure that the power is switched off here too.

Performing this task will enable you to look at the condenser in your air conditioner without being electrocuted by accident (one of the main parts you will need to examine while prepping your A/C). Because there’s typically a capacitor inside of the condenser, you should allow 30 minutes to pass in order for the electrical charge inside of the capacitor to dissipate. It’s a good idea to switch off the power to your other HVAC systems as well, such as the furnace, to truly ensure your safety.

Step 3: Clean Out the Air Filters

This step is the easiest to do since it doesn’t require much work other than grabbing the vacuum cleaner or finding replacement filters. Depending on the type of unit you own, you can either take this part out and clean it thoroughly before putting it back inside, or you can take the old one out if it’s grungy and replace it with a clean one.

It’s recommended to replace or clean this at least twice a year or more based on how much dust tends to accumulate. Doing this step will ensure that the dust and dirt buildup won’t circulate throughout the rest of your home.

Step 4: Clean Up the Condenser and Coils

Another fairly manageable task is to clear up any debris or dirt accumulating near these parts of your air conditioner. For central A/C units, this is located outside in the form of a large metal box with grilles covering fan blades. The coils are typically seen as radiator style fins, and this is where air must pass through the cooling process. Dirt can also accumulate on these coils, so you need to clean these up too before turning your air conditioning on. Otherwise, you won’t get as efficient a cooling job of the air that you need, plus it puts a strain on your system while increasing the money spent on energy.

To clean these parts, first unscrew the side panels and pull them away from the unit, then lift the top (be careful—this part may be heavy because of the weight of the fan). Do not pull any wires that are connected to the fan. Use the soft brush of your vacuum cleaner to gently clean the coils. Do not bend or damage these coils as they are very delicate; if you do end up bending one, use a fin comb which was made for this very purpose. Vacuum the coils both outside and inside.

To clean the condenser, scoop out any debris before anything else. Then, use the same soft brush of your vacuum cleaner and a rag to wipe down the fan blades. If your condenser has a drain, make sure this is clear and no debris is present there too.

Step 5: Check Up on the Thermostat

This step is very simple. Check the switches on the thermostat to ensure they are set to ‘on’ and ‘cool’. If you don’t see a digital display of the temperature, then the batteries need to be replaced. Depending on the type of thermostat your A/C uses, you will need the exact kind of batteries in order for it to function properly.

You can ask your technician to change the batteries and run a more thorough examination if you’d prefer.

Step 6: Run a Test

Once everything has been put back together and you’re finishing cleaning and checking things over, it’s time to test the air conditioner out. This will help you be certain that your unit will run as smoothly and efficiently as you need it to when the hot weather strikes. Again, make sure your thermostat is set to ‘cool’ otherwise the test may not work!

If you still find that you’re not getting the cool air that’s typical of your system, the problem may lie deeper and will require a technician to examine and diagnose it.

Important Tips

While you’re preparing your air conditioner, it’s a good idea to keep these tips in mind:

  • If at any point you detect something wrong as you’re prepping the A/C, turn the system off right away. Make note of what just happened, and then contact your technician about it.
  • Don’t handle any electrical parts or problems yourself. Leave those tasks to a professional.
  • Check on the air filters even when it’s not summer and replace them if needed. This is a no exception type of rule since it concerns your health!
  • Be sure to keep an eye on your furnace while performing these tasks as well. Sometimes airflow problems are connected to this system as well.

Need an inspection? Let us know

We’re licensed contractors who have spent years inspecting and ensuring that air conditioners are good to go before the summer heat really sinks in. If you’ve run into a hitch while preparing your A/C and following these steps, or you need a professional pair of eyes to find trouble before it starts, give us a call. At Rep-Air Heating And Cooling we provide our customers with many options that will best suit your needs from heating and cooling to refrigeration. Contact us today for your complimentary quote: 1-844-218-3362 or contact@repairheatingandcooling.com and don’t forget to take a look at our website: https://repairheatingandcooling.com. Follow us on Facebook and Instagram for free giveaways!

How Upgrading to a High Efficiency Furnace Can Save You Money

It’s that time of the year again…time to start using your furnace less and let the spring sunshine in to naturally heat your home. Rather than leave your furnace alone for another few seasons, why not take a look at it to make sure it’s running the way it should? If it’s getting old though or you’re spending more on heat than per usual, it may be time to consider replacing it. It’s best that you don’t replace your furnace with just any old model, however; it’s worth looking into high efficiency furnaces because in the long-term, they’ll save you more money. Here’s how that works.

How Efficiency is Decided

There’s a particular form of measurement that is applied to every new HVAC system on the market, and that measurement is called annual fuel utilization efficiency, or AFUE. This is a measure of how efficiently your furnace uses the fuel it’s given. (Source) Basically, the more efficient your furnace is, the more heat you’ll receive per fuel unit.

You need to know what the AFUE is because it makes all of the difference between how much or how little fuel you’re going to get out of your furnace. Ideally, you want to use a system that generates the most heat with the least amount of fuel needed, because that fuel also can cost you money. So, by upgrading to a more efficient furnace, you’re getting a lot more value out of both heating sources.

How Older Systems Differ in Terms of Efficiency

It’s easy to say that the older your furnace is, the less efficient it’s going to be, but what if we told you there’s actual research behind this? According to FortisBC, furnaces that were built in the 1990s only have about 60% AFUE. (Source) It means even though your furnace was properly installed and well-maintained since installation, it’s only going to return 60 units of heat for every unit of energy spent. It also means 40 cents worth of every dollar you’ve spent on heating your home is being thrown out via the exhaust.

It matters to know this sort of thing because your furnace could potentially be wasting your money as opposed to using every single dollar to create heat in your home. The latest furnaces are built with energy efficiency in mind, and if your home is older, then you know it’ll be worth the investment.

How to Afford a High-Efficiency Furnace

If you’re wondering whether to upgrade or not, you can do a few steps to begin with.

  1. Check the model number and manufacturing year of your furnace; you’re likely to find this in the owner’s manual. If the year is in between the 1990s and 2010, you’ve got either a standard or mid-efficiency furnace and should seriously consider a replacement.
  2. Calculate how much money you could be saving versus what you’re spending right now; you should always use a calculator from a trusted source. FortisBC offers a home energy calculator, which you can access by clicking here.
  3. Investigate whether or not you’re eligible for rebates. There are several guidelines to consider, such as whether or not you’re already a FortisBC customer, your heating system’s primary fuel type, and a consistent billing history of up to 12 months. All of these are an example of the sorts of eligibility you will need to look into; other guidelines may be present as well.
  4. Apply for rebates. An application form is available on FortisBC’s website with instructions. Click here to access it.

Need Help Installing a New Furnace?

As a trade ally to Fortis BC, we understand that when it comes to heating needs, our customers always come first. When you look at all of the research put together, it’s clear that upgrading to a more efficient furnace is a good choice to make. If your home consists of a standard to mid-efficient furnace, stop throwing your money out via the exhaust and start saving now with a replacement. Give us a call when you’re ready to start the installation process. We’re licensed contractors who can get the job done and done well. At Rep-Air Heating And Cooling we provide our customers with many options that will best suit your needs from heating and cooling to refrigeration. Contact us today for your complimentary quote: 1-844-218-3362 or contact@repairheatingandcooling.com and don’t forget to take a look at our website: https://repairheatingandcooling.com. Follow us on Facebook and Instagram for free giveaways!

About Indoor Air Quality on Commercial & Residential HVAC

With everyone staying inside more and more frequently, indoor air quality and keeping it clean, fresh, and breathable is now less of an afterthought and more crucial than ever to our daily lives. More specifically, it’s a big factor as to why we’re either feeling our best or our health needs improvement.

Not only is indoor air quality a significant factor to residential HVAC systems, but also to commercial as well. So let’s take a look at some things you really need to know about this subject.

Why Indoor Air Quality Matters

Before we dive further into the subject, it’s worth understanding why exactly indoor air quality is so significant and what it is exactly.

What it is: When we say indoor air quality we are talking about the air quality within and outside of any building or structure, in particular relating to the health and comfort of people occupying the building.

Why it matters: Knowing what the air quality is in your home or commercial building can determine the state of health your family, employees, and virtually everyone who breathes the air inside the building are experiencing.

Root causes: research has basically narrowed the root causes of indoor air pollution to these nine in total:

1) Building construction and design

2) Building not commissioned – i.e. checked to see if it works for people inside it

3) Indoor contaminant sources

4) Damp and dirty ventilation systems

5) Indoor activities and equipment that contribute to contaminants

6) Moisture enclosed in the building

7) Poor air cleaning and filtration

8) Poor ventilation rates

9) Poor outdoor air quality

What this all boils down to is, the older your building and the less maintenance performed, the more likely your indoor air will be polluted and the higher the risk becomes of getting ill as a result. You need to keep this quality under control for many reasons.

  1. Controlling the Air Quality Benefits Everyone

Not only are you keeping the air quality of your building fresh for health’s sake, but also according to research, air quality impacts productivity as well as profits. There is also research that confirms that 50% of all respiratory diseases are caused by indoor air pollution. So, by ensuring some sense of control, which you can now find on recently produced HVAC systems as well as air purifiers, you’re not only keeping yourself safe but also many of the people impacted in the home or commercial building.

  1. Opening a Window is Not Enough to Improve the Air

It’s easy to assume that the only way to increase ventilation and improve indoor air quality is to open a window. However, this alone is not enough. One study in particular shows that all of the outdoor air pollutants we may breathe in are in fact found more commonly indoors than out. So, in addition to breathing in the really gross indoor stuff such as mould, we’re breathing in outdoor things inside as well.

Some food for thought before you go ahead and crack the window open next time. Plus, the temperature of the air outside can also negatively affect your indoor air if you’re not careful, such as during a heat wave.

So, what can you do, other than open a window, next time the air smells stale? Try these solutions:

  • Ban smoking inside of the building; take it outside and away from the building.
  • Eliminate odours rather than use chemical air fresheners.
  • Dust often, and well, to prevent things like pet dander from accumulating too much.
  • Clean floors regularly. Carpets can be a source of dust too, so vacuum and use a carpet cleaner if needed.
  • Keep floor mats around. These can actually prevent larger pollutants such as dirt and dander from spreading into the building.
  • Use natural cleaners as opposed to toxic kinds.
  1. Causes of Poor Quality Can be Lessened by HVAC

Many of the downsides of poor air can all be deterred, provided you apply proper HVAC maintenance to your system, commercial and residential. The downsides we mean include all of the following:

  • Poor air quality
  • Pests and bugs
  • Dust
  • Fur dander, such as from pets
  • Mould and moisture
  • Lack of ventilation where needed
  • Thermal discomforts

With proper HVAC maintenance, you can improve indoor air quality easily. Cleaning the filters when recommended (every 3 months, or every month if you own pets) and ensuring the exterior is clean and nothing is blocking the outdoor units are both good tasks you can do yourself, whether you own them at home or you manage them at the office.

  1. Ventilation is a Must

Whether you need to apply a new coat of paint in the office or you’re renovating a new part of the building, the fumes and dust accumulating from these examples can contribute to negative effects in air quality. Most buildings are kept air-tight to prevent heat gain and loss both, but this in and of itself can make indoor air quality worse because it’s not allowing air pollutants to escape. This situation can make indoor air quality worse, as opposed to better, which is not what most people think will happen until it’s too late—those with asthma and allergies end up being the most affected.

Ventilation and air exchange in HVAC helps solve this problem and prevent air quality from getting worse. Air exchange is a big part of how HVAC works to serve you and your building better, whether residential or commercial. The exchange takes the stale, polluted indoor air and replaces it with fresh outdoor air. Not only will a properly maintained system keep the air indoors fresh, but also it will decrease humidity and its own slew of problems associated with it.

  1. Cleaning Goes a Long Way, Always

A clean system, whether it’s an HVAC one, a dehumidifier, or an air purifier, will not function the way it’s supposed to or keep your air clean unless you keep the system itself clean too. That’s why we always recommend cleaning the air filters in addition to other maintenance tasks. Having your machinery checked up by a professional technician every so often can also help with upkeep. An HVAC professional will be able to tell you if your HVAC is failing, if it’s the wrong size, or replace older systems with more up-to-date ones.

So long as you follow these guidelines, you can keep the indoor air quality in your home or commercial building clean, fresh, and healthier.

Keeping the indoor air clean isn’t an impossible task, but it does require work on everyone’s part. If you need us to do our part and help maintain your HVAC for the sake of indoor air quality, we’re always ready so give us a call. At Rep-Air Heating And Cooling we provide our customers with many options that will best suit your needs from heating and cooling to refrigeration. Contact us today for your complimentary quote: 1-844-218-3362 or contact@repairheatingandcooling.com and don’t forget to take a look at our website: https://repairheatingandcooling.com. Follow us on Facebook and Instagram for free giveaways!

Why the Cheapest HVAC System Isn’t Always the Best

With spring on the way, you may be thinking it’s high time to look into replacing your air conditioner, but there’s one problem: you can’t really afford the latest models on the market. It’s easy to look at the prices and assume you can find a cheaper alternative, but hold that thought before you go any further with it! It’s one thing to find a cheap price on something useful such as at a thrift store, but HVAC is a completely different kind of ballpark altogether. You do not want to skimp on the costs for new systems, because there are so many ways that can backfire. Here’s a look at what can happen when you invest in a cheap HVAC system.

  1. More Frequent Breakdowns and Repairs

You know that scenario when you’re tossing and turning in bed because it’s way too hot to handle, or you step onto an icy floor in the morning when the furnace should have been on all night? These scenarios are going to happen much more often if you rely on a cheaply purchased HVAC system. If you don’t know its age or how long it was used before you bought it, the chances of a breakdown or need for repairs are going to escalate.

  1. Less Efficient Heating and Cooling

As with most products, a cheaply bought HVAC system will not heat up or cool down a home as efficiently, reliably, or evenly as much as a recent model. Keep in mind that even the cheapest system can cost upwards of over one thousand dollars. Why spend so much on something that’s only going to fail to meet your needs, time and again?

Another factor that applies to this point is the SEER (Seasonal Energy Efficiency Ratio). At this point, it’s very unlikely you’ll find HVAC without a 16 SEER, or one that won’t have an effect on your energy bill. 

  1. Shorter Lifespans

Not only is a cheap system a danger to your wallet and energy bills, but also it’s unlikely they’ll last as long as newer HVAC does. That 10-20 year mark you’re hoping for with a cheaper system is basically non-existent. Instead, your cheaper HVAC will not last nearly that long. This applies to all cheaper purchased machinery whether it’s a laptop, kitchen utensils, or phones. You don’t have to pay a ton for good quality and a long lifespan, but cheap HVAC will not make that kind of cut.

  1. Lots More Costs

Not only will you have to pay the same amount it costs for an efficient system, but also you will have to pay more for the frequent repairs and the parts your cheap system requires that are discontinued. You’ll also have to pay your technician several times as opposed to only a few when it’s time for an inspection. Again, why would you consider investing in something that’s only going to cost you more down the road? All these extra costs will add up to an even more unaffordable rate, and then you’re stuck with a system you can’t sell off—you can only get rid of it and pay more by needing a replacement.

  1. No Long-term Benefits

Investing in a cheaper system is not as beneficial as you may think. The energy required is double that of the more efficient systems, there’s likely to be more leaks that harm your home and air quality, and you won’t get as efficient a job done of heating or cooling your home anyway. Put all this together and you’re looking at a way more expensive headache you don’t want. Instead of feeling the long-term benefits of newer HVAC such as lowered energy bills and staying comfortable all the while, you’ll be dealing with constant struggle.

Now that you know the dangers of cheap HVAC, it’s time to find a system that suits your needs and budget the best. If you’re looking for a second opinion from an initial price quote, why not talk to our team at Rep-Air? Our HVAC company not only knows how to find the correct sized system for your needs, but also knows how to get the most buck for your bang. We’ve served the Lower Mainland long enough to know how, so you can’t go wrong by giving us a call. At Rep-Air Heating And Cooling we provide our customers with many options that will best suit your needs from heating and cooling to refrigeration. Contact us today for your complimentary quote: 1-844-218-3362 or contact@repairheatingandcooling.com and don’t forget to take a look at our website: https://repairheatingandcooling.com. Follow us on Facebook and Instagram for free giveaways!

HVAC Maintenance Tips for Homeowners with Pets

What do dogs and cats have in common (other than they’re both four-legged and furry)? They are pets! Homeowners can be pet owners too, and it’s these kinds of people we’d like to talk about today. That’s because homeowners who are pet owners not only have to take care of their fur babies, but also their homes – and in this case, the HVAC systems. Here are some of our HVAC maintenance tips for homeowners who are pet owners as well.

  1. Clean Air Filters More Often

The thing about being a pet owner is, you get a lot of dog or cat hair floating around too, not just on your favourite clothes. A lot of that dander and fluff can float into the nearest air vent and accumulate together into one big hairy clog of a mess, meaning your HVAC systems are going to work harder than they should to provide proper heating or cooling. It means your energy bills are going to spike up in cost, too.

Pet owners will have to clean the air filters in their HVAC systems a little more often in order to achieve greater airflow and decrease the likelihood of unpleasant surprises when your energy bill arrives. Typically, homeowners may clean their filters every 3 months, but in the case of pet owners since pet dander does accumulate way more often, we recommend they clean the filter every month. That way you’re extending the lifespan of the HVAC in your home.

  1. Groom Your Pets

Grooming your dog or cat is not only a good way to bond, but also it helps them shed less! Going back to the air filters tip, blockages don’t just affect the performance of your HVAC’s abilities alone. The accumulation of pet dander and fur in the vents can decrease the quality of the indoor air you breathe in tremendously, and this is bad especially if you or your family have allergies to be aware of.

Dispose of the fur each time you finish brushing or combing your pet properly, and if your pet is a long-haired breed then it’s wise to vacuum when you’re done also. This will not only improve the HVAC, but also the indoor air quality it’s supposed to help with.

  1. Pets Deserve Comfort Too!

Anytime you need to leave the house and your pets must stay behind, it’s best to program the thermostat so that it’s set to a comfortable level. While pets may not need the same level of heating or cooling as humans too, nonetheless they deserve to be as safe and comfortable as you.

Wondering about ideal temperatures? Here are some suggestions. For the hours you’re away, from home should be between 23 to 25 degrees Celsius (75 to 78 degrees Fahrenheit) in the summer, and between 20 to 22 degrees Celsius (69 to 72 degrees Fahrenheit) in the winter. You are free to adjust these temperatures slightly depending on your pet’s age, weight, fur coat length, and health, but don’t go any lower than 15 degrees Celsius (60 degrees Fahrenheit) in winter or any higher than 26 degrees Celsius (80 degrees Fahrenheit) in the summer. Leave out water and a room to keep your pets cool when it’s hot, and a warm bed and open curtains for a sunny spot when it’s cold out.  

  1. Invest in an HRV or ERV System

Either one of these systems can help pet owners get fresher, cleaner air in their homes without giving up comfort. The HRV, or Heat Recovery Ventilation, is designed to take warm, stale air to heat up the fresh air; the ERV, or Energy Recovery Ventilation system, uses humidity in a home to achieve that same process.

“Why not an air purifier?” you may be wondering. The answer is simple as we look at the two kinds. An air purifier will detox the air that exists in the room. The HRV/ERV systems are called exchangers, meaning they will exhaust the stale indoor air and replace it with fresh air from outside.

Air purifiers are considered supplementary to ventilation systems. In contrast, a ventilation system itself comes built with an air filter and both removes the particles likely to harm you and your pets and freshens up the indoor air. So, in the long run, a ventilation system may work best for your family and pets in the long-term. Of course, you have your choice in systems depending on your budget, the size of your house, and various other factors, so consider all of these before you make your choice.

For more information on HRV and ERV systems, you can refer to our previous blog post, “The Differences Between HRV and ERV Systems.”

  1. Keep Pets from the Outdoor Units

The last thing you want is for your pooch to use your air conditioner’s outdoor unit as their bathroom! To avoid messy situations like this, or prevent further clogging thanks to your pet’s dander and fur, fence off any outdoor units you own for your heating or cooling systems.

Make sure the fence itself doesn’t interfere with the unit’s functions to draw in the air it needs as well. We suggest a clearance distance of 2 feet all around the unit. For multiple units, a clearance of 4 feet apart is recommended.

Get Some Help from Technicians You Can Trust

We love pets of all kinds and sizes and we want them to be as safe and happy as you want to be! If you’re struggling to keep up with cleaning the air filters, or you need help installing a ventilation system to improve your home’s indoor air quality, go ahead and give us a call. At Rep-Air Heating And Cooling we provide our customers with many options that will best suit your needs from heating and cooling to refrigeration. Contact us today for your complimentary quote: 1-844-218-3362 or contact@repairheatingandcooling.com and don’t forget to take a look at our website: https://repairheatingandcooling.com. Follow us on Facebook and Instagram for free giveaways!